This project aims to create a simple watcher that keeps tabs on plant moisture and let’s you check it in real time using your phone. It’s based on an Arduino Nano, Raspberry Pi and some analog soil moisture sensors. Of course, you could head out and buy some pre-made device for this, but it’s more fun building it yourself. This project is expecting that you already have some wiring, a soldering iron and basic tools for electronic work.
This project was developed in partnership with Conrad in their efforts to showcase makers around Sweden. I would therefore like to thank them for providing the hardware used in this project. Please also check out their website for more interesting projects.
Just as the last one, this project is very straight forward, requiring only parts that you can plug and play combined with a basic knowledge of Raspberry Pi and Linux. The products required are listed below:
Raspberry Pi (Model 3 with Wi-Fi)
Click here to view product at Conrad.se
Micro-USB cable for Raspberry Pi power
Click here to view product at Conrad.se
SD Card for the Raspberry Pi
Click here to view product at Conrad.se
USB Power Supply for Raspberry Pi
Click here to view product at Conrad.se
Arduino Nano
Click here to view product at Conrad.se
Mini-USB cable for Arduino
Click here to view product at Conrad.se
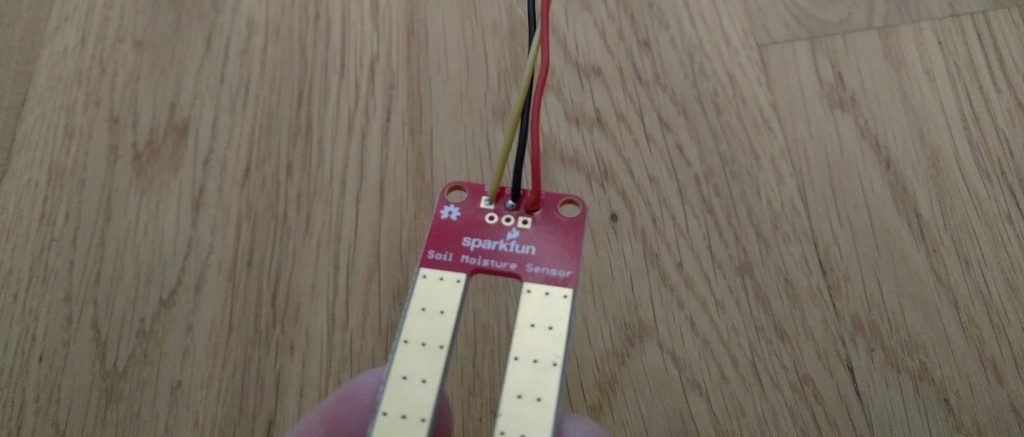
Sparkfun soil moisture sensors (as many as you want)
Click here to view product on R-pi.se
The products listed above are essentially all you need to get this up and running, but I wanted to take this a step further so I reached out to my good friend Eric Vinjegaard to help me design a proper case for this. His idea was to design it as a greenhouse which is 3D-printed in a few parts and easily assembled. I’ll let you know more about the case in the coming steps, but here are the parts needed if you want to use ours.
Long USB cord
Click here to view product on Conrad.se
USB case adapter
Click here to view product on Conrad.se
Now that’s out of the way and we’re ready to get started on this build. It’s very simple and should be straight forward.
1. Set up Raspberry Pi
Download the latest Raspbian operating system and install that to the Raspberry Pi SD-card. I recommend that you use the application Etcher in order to flash the image to the SD-card. This will make sure all data is transferred securely and verified. You can then use this guide to connect your Raspberry Pi to your wireless network. In order to enable SSH on first boot, simply mount your SD-card on your computer and put an empty file called ssh right onto the /boot partition. Unfortunately there seems to be a bug in the correct version of Raspbian (Stretch) which means that even when the wireless network has been configured, it simply won’t connect. This means that you need to plug in your Raspberry Pi through Ethernet and connect through SSH, then follow these steps.
Execute the following command:
sudo nano /etc/network/interfaces
And place these lines of code at the end of the file:
allow-hotplug wlan0

iface wlan0 inet manual

wpa-conf /etc/wpa_supplicant/wpa_supplicant.conf
Enable the Wi-Fi service using this command:
sudo systemctl enable wpa_supplicant.service
And then reboot the Raspberry using sudo reboot. If all wen’t well you should now be able to connect to your Pi through Wi-Fi as well and can disconnect the ethernet cable, should you wish to do so.
2. Change the Raspberry Pi hostname
Once your Raspberry Pi is connected to your network it’s hostname will be raspberrypi. You can keep this, but I recommend that you run the command sudo raspi-config and use the tool to change your hostname to something. I use the name plantpi to make it easier to identify in the network.
3. Update Node.js to the latest version
Node.js is already installed on the Raspberry Pi, but it’s an old version and should not be used. Also, we’re lacking NPM (the package manager) which we also need for this project, so we best update and install. Before you perform the upgrade, make sure to run both sudo apt-get update and sudo apt-get upgrade to get the latest versions installed. Then we execute the following command to add the latest version of Node.js to the definition list:
curl -sL https://deb.nodesource.com/setup_8.x | sudo -E bash -
And then run this command to install the latest version of Node.js and NPM:
sudo apt-get install nodejs
Now, if you type node -v or npm -v you should get something along the lines of v8.4.0 and 5.3.0 or later.
4. Upload software to the Arduino Nano
Now that most of the work on the Raspberry Pi is done we can continue by setting up our Arduino Nano. Use this command on your computer to clone the latest version of the Plant Guardian Arduino code:
git clone https://github.com/jonathanlundstrom/plant-guardian-nano.git PlantGuardianArduino
After that, go ahead and open the file PlantGuardian.ino and upload the sketch to your Arduino through USB. Simple as that!
5. Wire up the soil moisture sensors
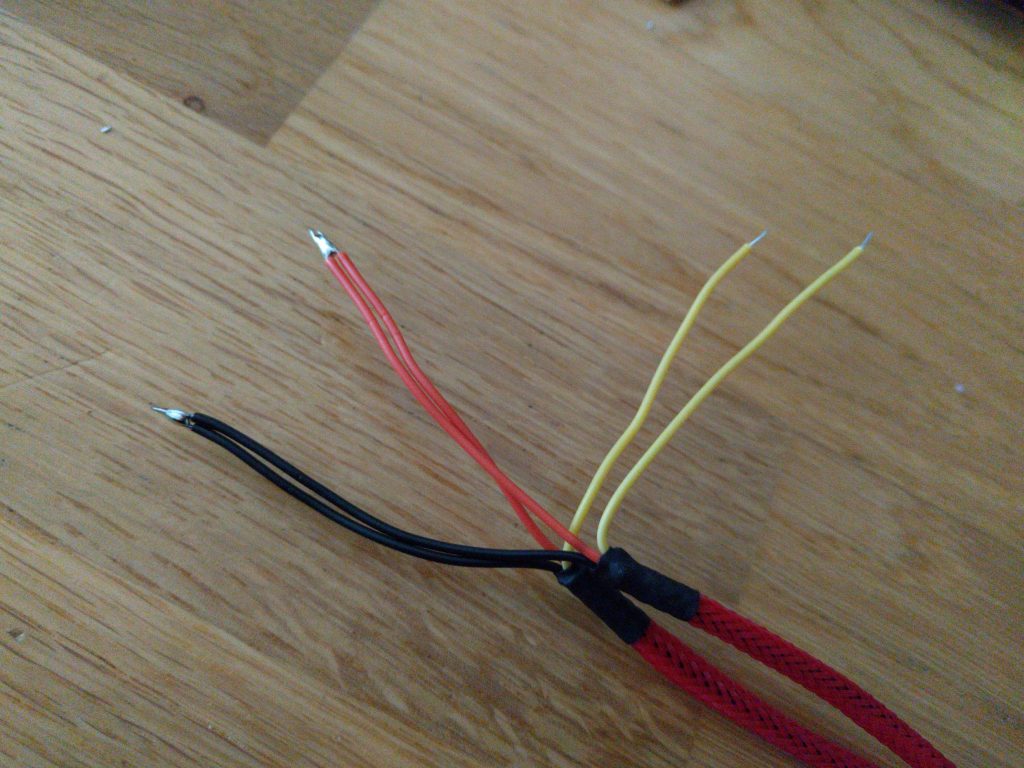
The sensors are fairly easy to wire up. All they need is wiring for 5V, Ground and Signal. I suggest using red, black and yellow but any color will do. Hook them up something like this and then solder on some dupont connectors at the end of the each cable so that they can be connected to the Arduino. Keep in mind that you need to join 5V and Ground as there is only one output for these. The signal cables should be connected to A0 and A1. Each pin is labeled on the opposite side, so connecting the wires should be a piece of cake.Should something not work properly there is a debug flag you can adjust in the Arduino software from the previous steg. Enable this and it will give you the serial responses in the console.
After you are done with wiring and have everything plugged in, connect your Arduino to your Raspberry Pi through any of the available USB ports.
6. Download and install the PlantGuardian Node.js software
Since our Arduino is now ready to roll it’s time to install the PlantGuardian software on our Raspberry Pi. Start off by connecting through SSH (display + keyboard is equally fine) and then go to your home directory using the command cd. Once there, issue the following command to clone the software:
git clone https://github.com/jonathanlundstrom/plant-guardian-node.git Applications/PlantGuardian
Then enter the directory using this command:
cd Applications/PlantGuardian
We can now install the software dependencies by issuing this command:
npm install
Keep in mind that this might take around 5-10 minutes as the Raspberry is downloading and compiling a lot of packages and it’s not the fastest machine around. Be patient! Once it’s done you should run this command to compile the application assets, npm run build. You are now ready to launch the application using the following command:
npm run server
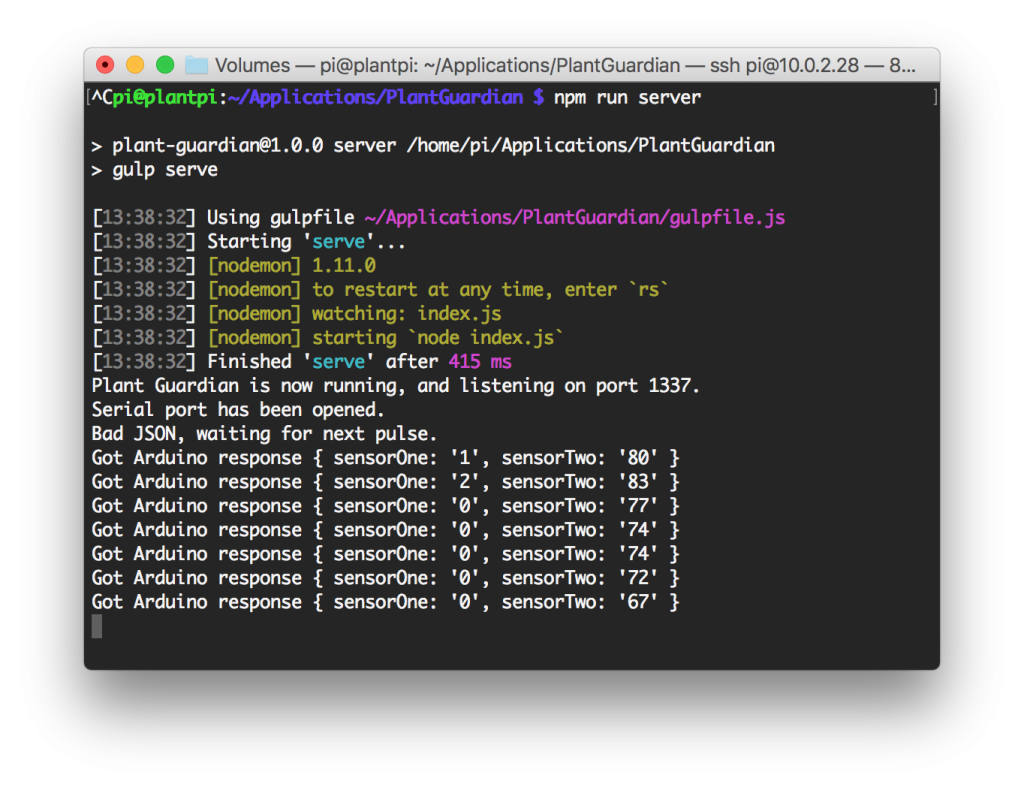
If everything is working you should see something similar to the image below. Keep in mind that only one of my sensors are connected to a plant in this particular screenshot. Also, we’re working with analog sensors and they tend to float a bit, so don’t expect all the values to be spot on, but they’re very much good enough to give you a good indication of the current soil moisture. Now that we’ve got this working we’ll stop the program by using CTRL-C and then continue to the next step.
7. Install Supervisor and keep the server software alive
In order to make sure the software is always running on the Raspberry Pi we will install something called Supervisor. It allows us to set up jobs that should be kept alive and automatically started on reboot, should you ever need to do so. Use the following command to install it:
sudo apt-get install supervisor
Next, we need to create a new job, so navigate to the correct directory using cd /etc/supervisor/conf.d and create a new job using sudo nano guardian.conf. Next up, paste the following code into the editor and save using CTRL-X.
[program:guardian]

directory=/home/pi/Applications/PlantGuardian

command=npm run server

autostart=true

autorestart=true

stderr_logfile=/var/log/guardian.err.log

stdout_logfile=/var/log/guardian.out.log
All we need to do now is to go inside Supervisor using the command sudo supervisorctl and then command it to reread followed by reload. Once this is done and Supervisor has restarted you’re done. It will take around 20 seconds, but you should then be able to visit http://plantpi.local:1337 on your phone or mobile device and get the correct readings. You can also bookmark this page on Android and iPhone devices to use it as a standalone app. Also, if you forward your ports you can even use this when not at home.
8. Print the official Plant Guardian case (optional)
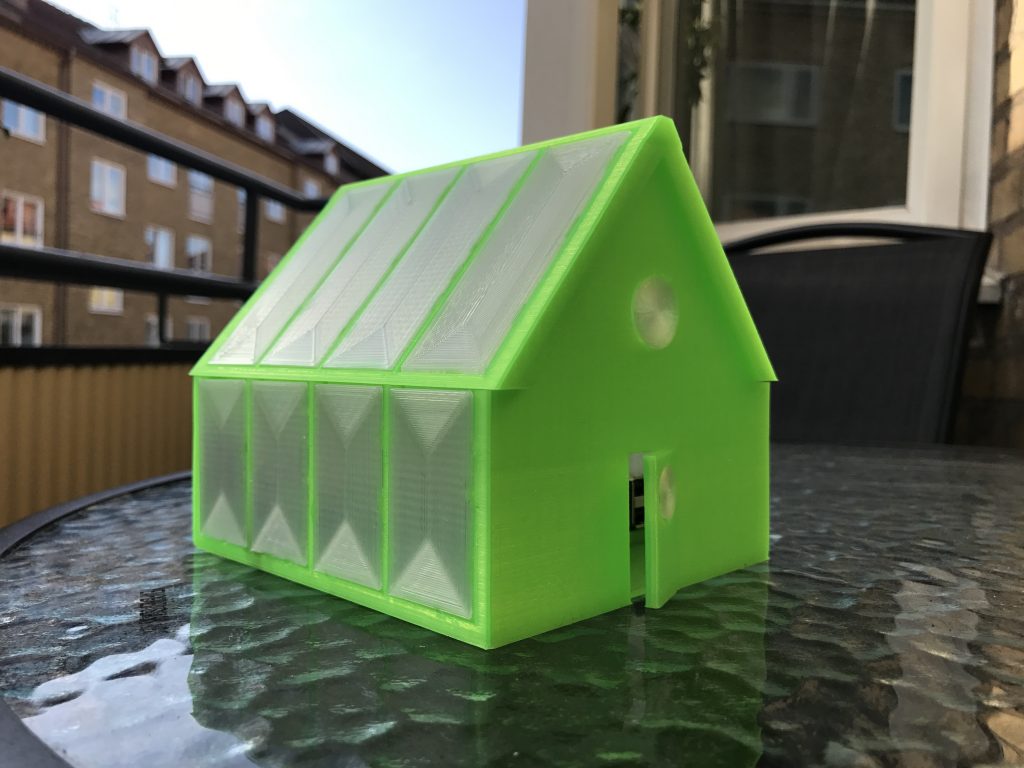
The 3D-printed case is designed by Eric Vinjegaard and made for this project. It’s supposed to symbolize a greenhouse and all the components can be printed, even the windows. We recommend you print the base and roof with either a grey/metal filament or wood/brown and use transparent material for the windows. You can find the case on Thingiverse. Big thanks to Eric for this awesome design!
Node.js source:
https://github.com/jonathanlundstrom/plant-guardian-node
Arduino source:
https://github.com/jonathanlundstrom/plant-guardian-node
3D-printed case:
https://www.thingiverse.com/thing:2492057
Things other people recently wrote