
This project aims to help you create your own Google Home through the use of a Raspberry Pi, an Arduino Nano and some cheap components such as a USB soundcard, speaker and microphone. Of course, you could just go out and buy a Google Home or Google Home Mini, but building it yourself is more fun. This project is expecting that you already have some thin electronic wiring, a soldering iron and basic tools for electronic work.
This project was developed in partnership with Conrad in their efforts to showcase makers around Sweden. I would therefore like to thank them for providing the hardware used in this project. Please also check out their website for more interesting projects. I would also like to thank Eric Vinjegaard for his work on the 3D-printed chassi and Jirka van der Roest for his awesome work on the Arduino code.
Just as the last one, this project is very straight forward, requiring only parts that you can plug and play combined with a basic knowledge of Raspberry Pi and Linux. The products required are listed below:
Raspberry Pi (Model 3 with Wi-Fi)
Click here to view product at Conrad.se
Micro-USB cable for Raspberry Pi
Click here to view product at Conrad.se
SD Card for the Raspberry Pi
Click here to view product at Conrad.se
USB Power Supply for Raspberry Pi
Click here to view product at Conrad.se
Arduino Nano
Click here to view product at Conrad.se
Mini-USB cable for Arduino
Click here to view product at Conrad.se
Adafruit 16 pixel LED-ring
Click here to view product at Conrad.se
External USB Soundcard
Click here to view product at Conrad.se
Bluetooth Speaker
Click here to view product at Conrad.se
USB Microphone
Click here to view product at Conrad.se
The products listed above are everything you need to get started with this project and you should end up with a functional product. Although, if you want the product to look a bit prettier, make sure to print the official case by Eric Vinjeegard using a 3D-printer of your choice.
1. Connect LED ring and upload software to the Arduino Nano
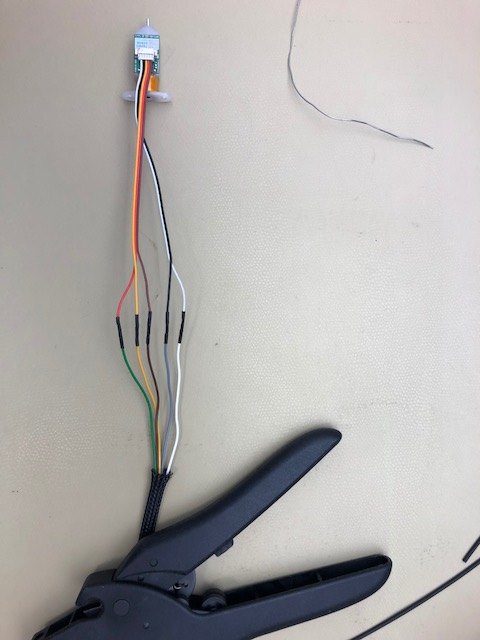
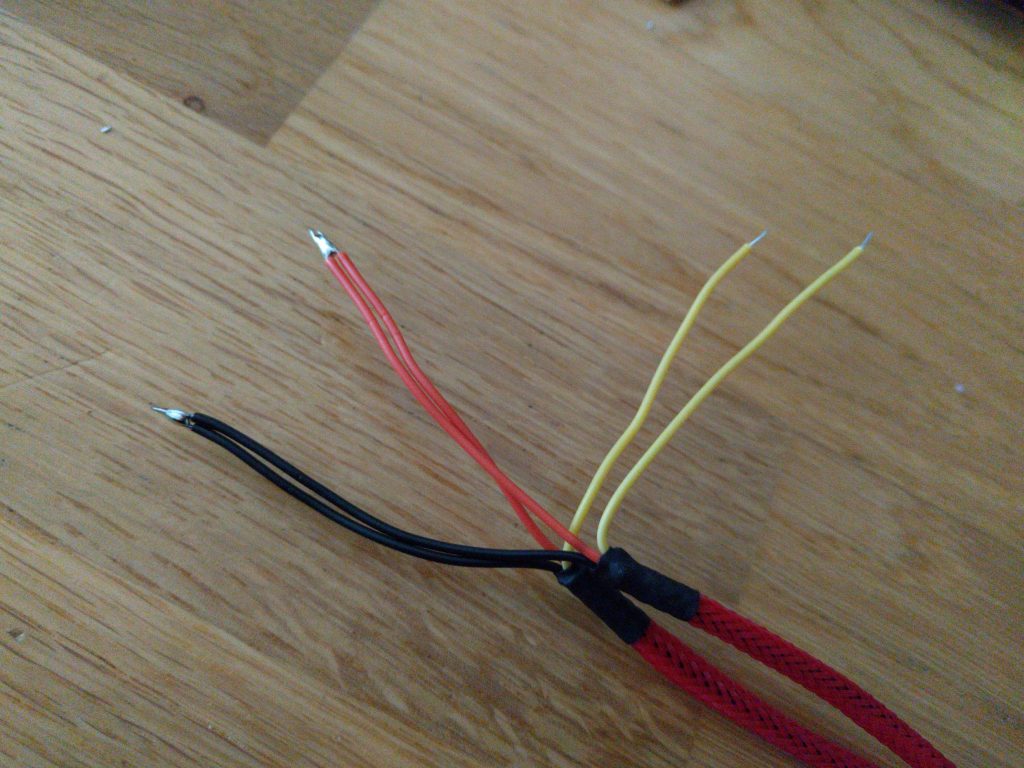
The LED-ring easily connects with only three wires that you should solder to the ring. On the opposite side it’s good to have dupont connectors to easily connect them to the Arduino pins. The pins that we’re going to use are 5V, GND and D6 (signal/control). You can see how they are connected on this image below.

Now that you’ve connected the LED-ring, go ahead and run this command on your computer to clone the latest version of the ConradAssistant Arduino code:
git clone https://github.com/jonathanlundstrom/conrad-assistant-arduino ConradAssistantArduino
After that, go ahead and open the file LED_Ring.ino and upload the sketch to your Arduino through USB. Simple as that!
2. Set up the Raspberry Pi
Download the latest Raspbian operating system and install that to the Raspberry Pi SD-card. I recommend that you use the application Etcher in order to flash the image to the SD-card. This will make sure all data is transferred securely and verified. You can then use this guide to connect your Raspberry Pi to your wireless network. In order to enable SSH on first boot, simply mount your SD-card on your computer and put an empty file called ssh right onto the /boot partition. You can also go ahead and open the file config.txt in a text editor of your choice (not TextEdit on Mac OS). In this file, make sure to add these two lines in the bottom. It should theoretically be able to improve audio quality a bit.
# Disable audio dither

disable_audio_dither=1
You can now go ahead and eject the SD-card, put it in your Raspberry Pi and boot it up.
3. Change the Raspberry Pi hostname
Once your Raspberry Pi is connected to your network it’s hostname will be raspberrypi. You can keep this, but I recommend that you run the command sudo raspi-config and use the tool to change your hostname to something. I use the name assistantpi to make it easier to identify in the network.
4. Set up audio hardware and configure software
We now need to set up the proper microphone input and audio output. Thankfully, Google themselves have created a really simple and easy guide on how to do this. In my case, using the USB soundcard listed above, I’m using card #1 and device #0 on both the microphone and output.
5. Configure a Developer Project and Account Settings
Once again, Google has got us covered with instructions on how to set this up. Follow the instructions and keep checking back here in case you are missing something. In my case, I decided to call the project Conrad Assistant. When registering the product, I once again used the name Conrad Assistant and set my name as the manufacturer (Jonathan Lundstrom). Since we are working on building a home assistant, Speaker is a suitable category. Make sure you download the credentials.json file as we’re going to need that very soon. Also, there is no need to select any of the traits as those do not apply.
6. Set up the Python environment and Assistant SDK
In this step we will use the credentials.json file that you downloaded in the previous step. Take that file and upload it straight to the home directory of your Raspberry Pi. In this case that path would be /home/pi. Now that you’ve got the file in place, follow the instructions that Google provides in this guide and come back here after you’re done. If everything is done correctly, a new credentials file will be stored in the .config folder of your home directory and used by this application.
Once you’re inside the virtual env that Google had you create, it’s also important that you add some extra packages required by the application. Use the commands below to install them.
pip install pyserial

pip install RPi.GPIO
Assuming the packages above were installed you should be ready to proceed.
7. Download the ConradAssistant project files and test the application.
First of all, navigate to your home directory and once there, clone the project files through the following command.
git clone https://github.com/jonathanlundstrom/conrad-assistant-python Applications/ConradAssistant
If everything went well we’re now ready to test the application. From your home folder, run this command:
env/bin/python ~/Applications/ConradAssistant/assistant.py
The lights on the LED-ring should do a rainbow swirl and then pulsate indicating that it’s listening for your voice commands. To give it a command, simply say “OK Google” or “Hey Google”. To exit the application, simply use CRTL + C.
8. Install Supervisor and keep the application alive
In order to make sure the application is always running on the Raspberry Pi we will install something called Supervisor. It allows us to set up jobs that should be kept alive and automatically started on reboot, should you ever need to do so. Use the following command to install it:
sudo apt-get install supervisor
Next, we need to create a new job, so navigate to the correct directory using cd /etc/supervisor/conf.d and create a new job using sudo nano assistant.conf. Next up, paste the following code into the editor and save using CTRL-X.
[program:assistant]

user=pi

directory=/home/pi

environment=HOME="/home/pi",USER="pi"

command=/home/pi/env/bin/python /home/pi/Applications/ConradAssistant/assistant.py

autostart=true

autorestart=true

stderr_logfile=/var/log/assistant.err.log

stdout_logfile=/var/log/assistant.out.log
All we need to do now is to go inside Supervisor using the command sudo supervisorctl and then command it to reread followed by reload. Once this is done and Supervisor has restarted you’re done and the application will start whenever the Pi is started, and restart should something unexpected happen.
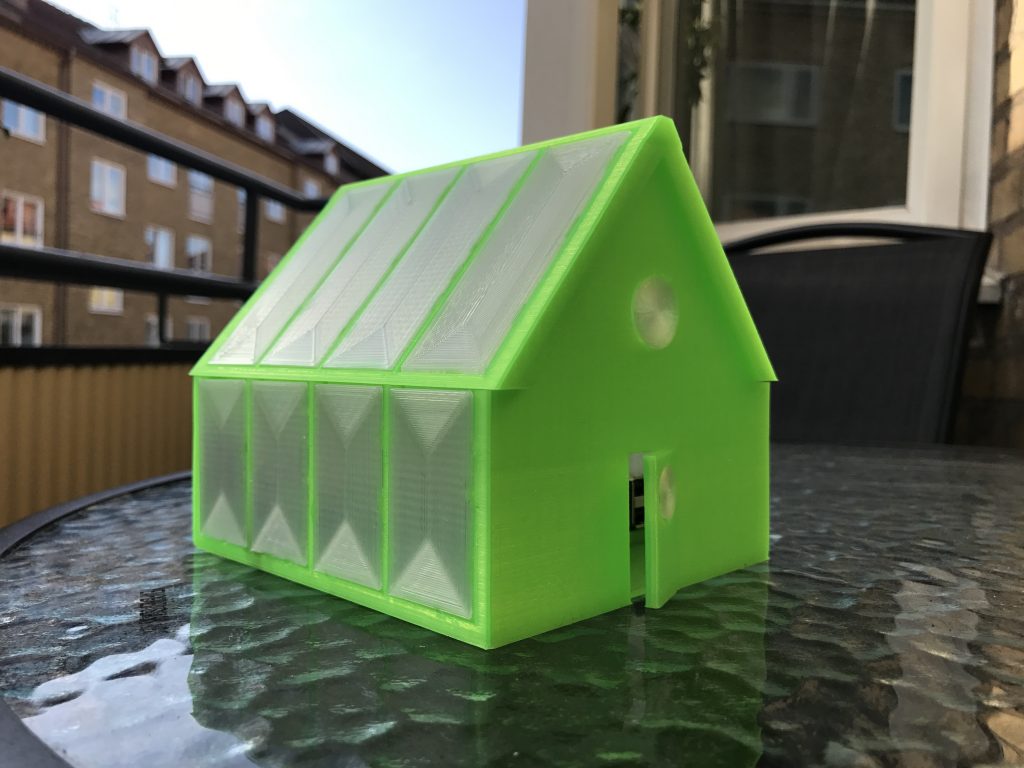
9. Print the official Conrad Assistant case (optional)

The 3D-printed case is designed by Eric Vinjegaard and made for this project. It’s a twist of the official Google Home design and all the components can be printed. You can find the case on Thingiverse. Big thanks to Eric for this awesome design!
Python source:
https://github.com/jonathanlundstrom/conrad-assistant-python
Arduino source:
https://github.com/jonathanlundstrom/conrad-assistant-arduino
3D-printed case:
https://www.thingiverse.com/thing:2492057


Things other people recently wrote